Saturday, October 29, 2011

The Coral Skirt & A Boob Handbag

This is the first of the "A Skirt on Saturday" projects. I got this hand-me-down piece of ill fitting weird cut neck holder whatever tunic...

DSC_0912

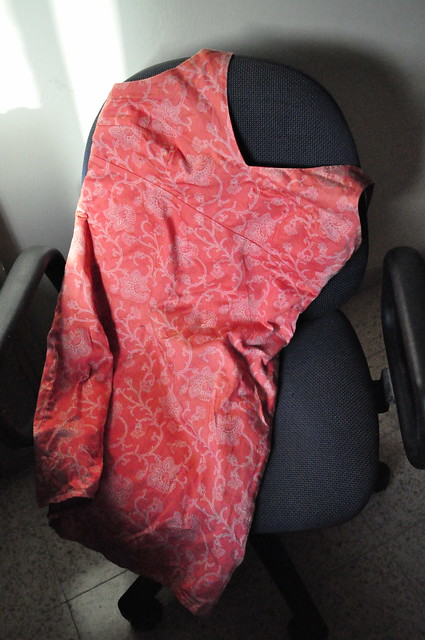
I loved the fabric and the red lining so I couldn't just throw it out or pass on. I had to redo it. It actually was way to big on me around the chest so one time I just pulled it down to see how low it would fit and the idea of making it into a skirt was born.

DSC_0917

So first I grabbed my seam ripper and removed the top part both outer fabric and lining from the bottom part. I left the zipper in and just cut it shorter and finished off the new edges. I then pinned the lining and outer fabric to fit around my waist (since it was cut a bit roundish when it was a top... I basically straightened it to make it a skirt so it would bulk up weird around my waist. I then sewed the lining and outer fabric right sides together on the skirts top part. And that's it. A simple nice skirt.

The top part I made into a little purse. I cut off the straight parts that where originally on the back. I then sewed the two bust pieces together and added a strip of the same fabric on the bottom so the tiny purse could actually hold something. Repeat for lining. I simply knotted the two straps (that used to be neck holder straps) together and that's it. I can fit in my wallet, keys and phone.

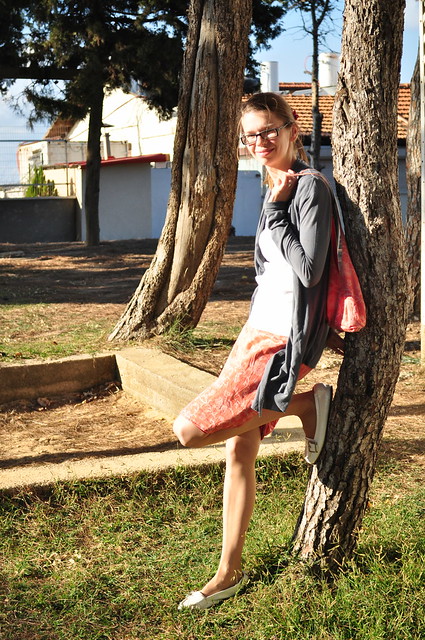
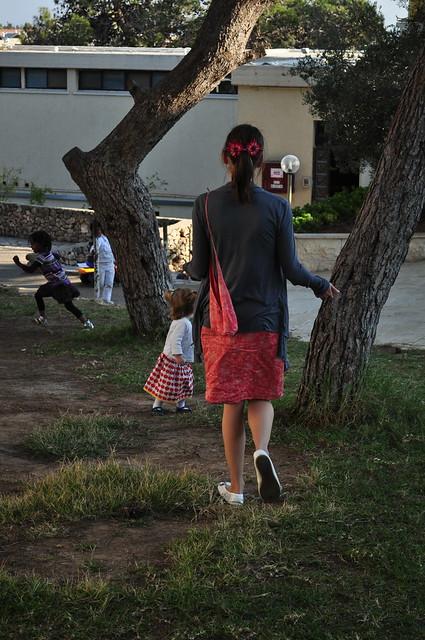
A real quick recycling project and here is how it looks like in real life.

DSC_0966

DSC_0965

DSC_0969

Wednesday, October 26, 2011

Apple A Day...

...keeps the doctor away... and a skirt a week keeps the girly chick!

I like skirts and I love to make them. I have a bunch of skirt projects hanging around in the sewing room so I will start posting a skirt project every Saturday. This is to end the procrastination.  There are skirt patterns that need to be tried, too big skirts to be fitted, some other refashion projects and lots of nice fabrics and patterns. So I am excited and I hope you too.

skirt button


If you would like to follow "A Skirt on Saturday" or join in (it doesn't need to be every week) I would be very happy. There is a flickr group and an album on my facebook page to post your pretty skirt creations - so share share share! If you decide to post A Skirt on Saturday on your blog please link back to me, so I can come over and have a look! Grab my "A Skirt on Saturday" button in my sidebar!

Tuesday, October 18, 2011

A Book Cover For A Friend

simple but beautiful - felt flowers and buttons

mushroom ribbon

gingham love.

Friday, October 14, 2011

Happy Sukkot! (Feast of Tabernacles)

 Wednesday night was Erev Sukkot (the beginning of the Feast of Tabernacles). We had a bunch of friends over at our house for dinner. Unfortunately we don't have a space to build a real Sukkah (tabernacle/booth) but you can't really have this holiday without one. So I put a bunch of craft supplies out on the table and had each family make their own mini Sukkah. It was a lot of fun. You only need some craft paper, stapler, tape, olive branches, throw in some crayons and crepe paper for decoration and there you go. It was quiet busy that night and everybody took their Sukkah home, so I don't have any proper pictures. But here is what I snapped during the happy booth making! Hope you don't mind the craft mess around...

A Sukkah for the table

side view

colored Sukkah, and Sukkah-making in action

It's tradition to decorate the sukkah with fruit


A triangle sukkah

Wednesday, October 5, 2011

5 Minute Shirt


  This is probably the simplest and quickest shirt I've ever sewn. I needed something new to wear  in the last minute... So that's what I came up with:

cut 2 identical rectangles of fabric
sizing: 
height - measure from shoulders to hips (or longer if you wish) 
width - i took a different boring regular wide T-shirt and measured from sleeve to sleeve
my rectangles were each 50cm x 65cm (about 20 in x 26 in)

Cut out a rounding on both sides of each rectangle and on top according to the sketch. (You should now have two identical pieces of fabric looking like the darker shade of blue in the sketch) :

Pin the two fabric pieces right sides together and sew along the rounded side edges and the two straight edges on top (the purple dotted lines on the sketch).

Believe it or not,
You've got a new shirt!

Well, you got a shirt with raw edges... you can always finish off the edges with a regular hem or whatever else you like... but than it might take you 10 minutes to finish the shirt :-) I only finished off the edges on the sleeves in my version in order to hide the selvedge of the fabric that was showing on one side. It looked odd to have one sleeve with a wider stripe of the light blue color...

Some notes:
- If you use a striped fabric like I did line up the stripes when cutting the fabric and before sewing the fabric together line the stripes up again and pin in place.

- Add a matching fabric flower for a fresh look!

Saturday, October 1, 2011

Felt Backgammon Board

simple hand stitched felt backgammon board
I made this backgammon board a while ago... It turned out more difficult than I thought to get those triangles straight (which I didn't)... but I like how it turned out.
Related Posts Plugin for WordPress, Blogger...